

How to install JivoChat on WIX
Method 1: Embed the JivoChat code on your Wix panel#
This method is available only for paid versions of Wix
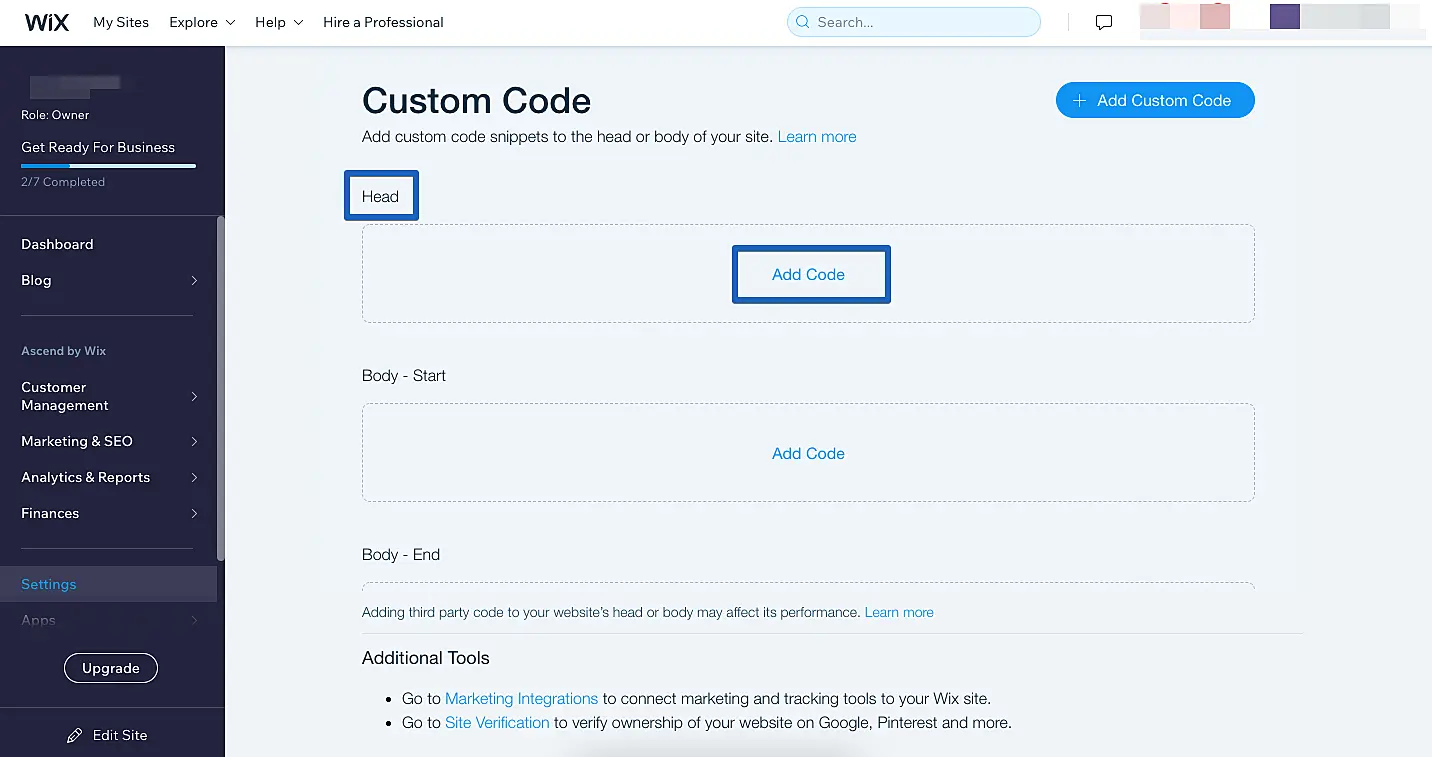
1. Access the Wix panel and click on Settings. Scroll down to the bottom of the page until you find the Advanced section and then click on Custom code.

2. In the Head section, click on Add Code.
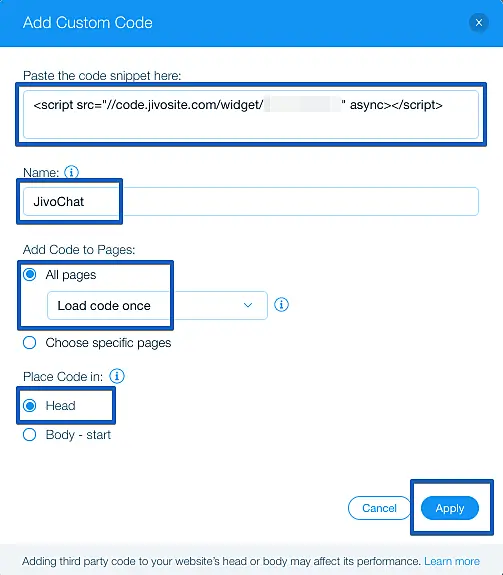
3. Paste JivoChat installation script in the field Paste the code snippet here and insert a Name for future identification of the custom code (e.g. JivoChat).
In the field Add Code to Pages, select the options All pages and Load code once. In the field Place Code in, make sure the option Head is selected. To finish the installation, click on Apply.
4. Click on the Publish button in the top-right corner of the screen to finish the installation.
That's it! You're done!
Method 2. Install via plugin from the Wix app market#
This method is available for free Wix users
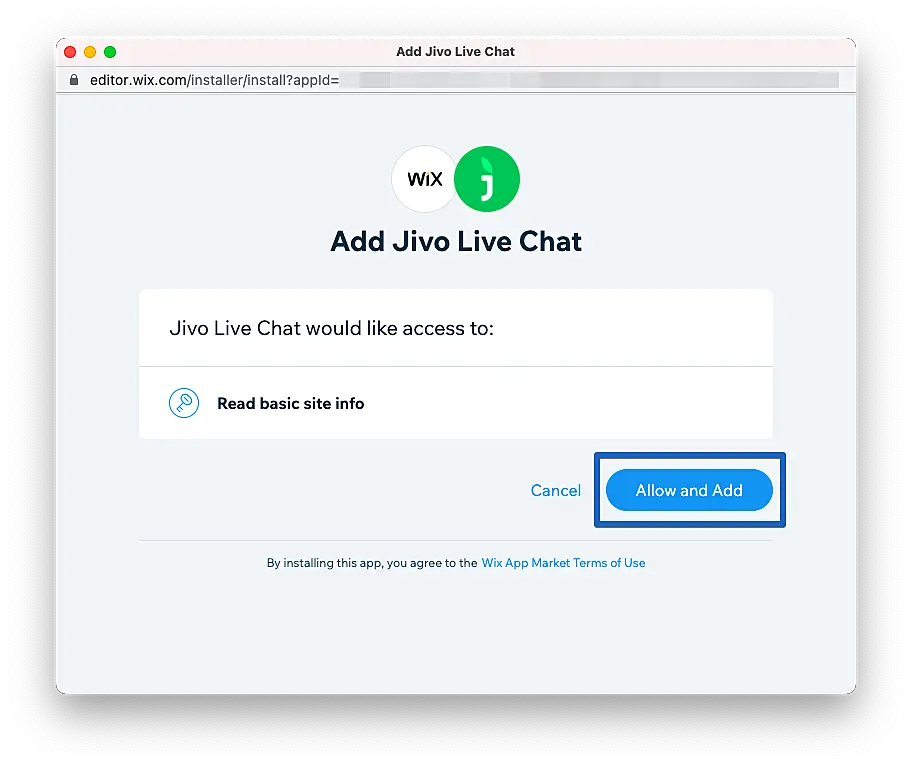
1. Access the Wix panel and go to Edit site section. Click on Add Apps button and search for "JivoChat", or select the Communication category, find JivoChat Live Chat, and click on Add.

2. Click on Allow and Add.
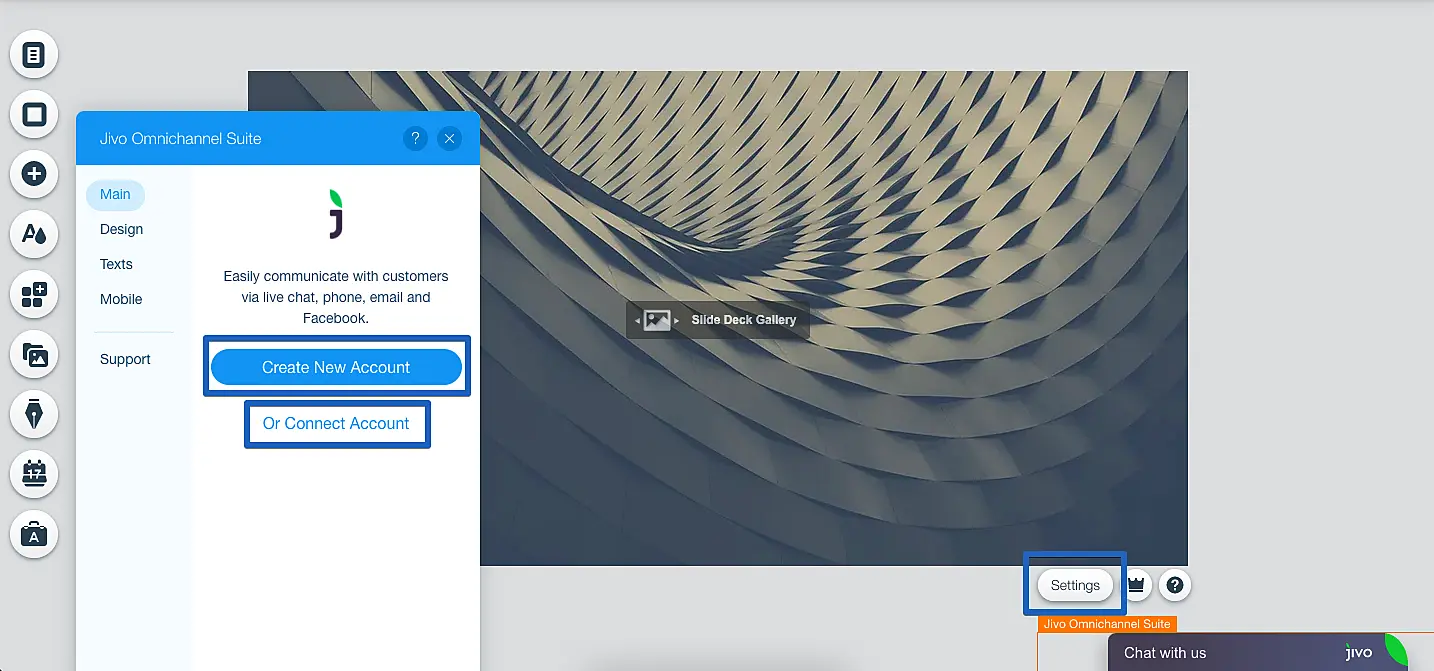
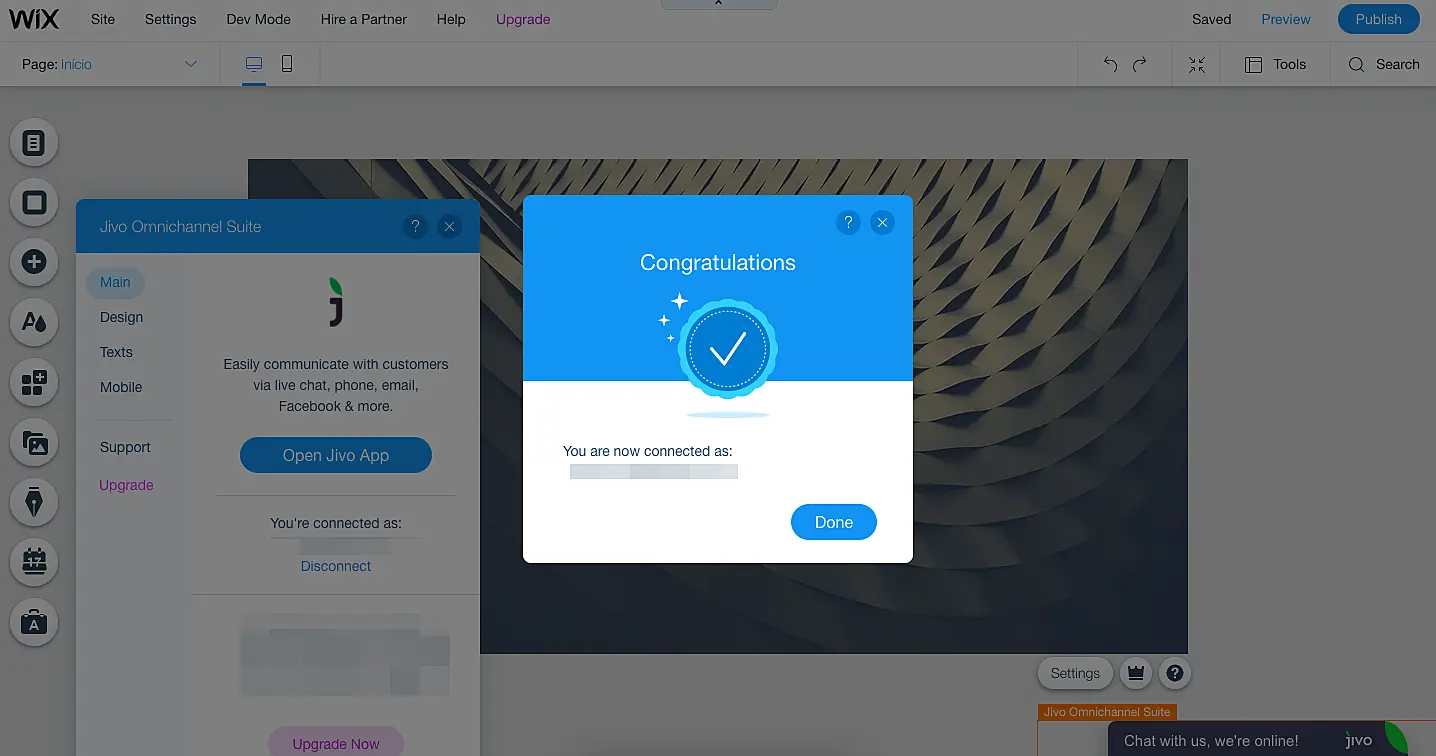
The widget is installed, now you just need to connect it your JivoChat account.
3. Click on Settings button in the top of the widget.
If you don't have an account on JivoChat yet, click on Create a new account, insert your email, select the chat window language and click on Connect.
If you are a registered user, click on Or connect account, insert your JivoChat email and password, and click on Connect.
4. Next, click on Done and then click on Publish in the top-right corner menu.
Restrictions
- Although you can edit some Design and Texts options from the widget settings section on Wix, we highly recommend you make changes in Design and Texts directly from our application.
- On mobile version, the default JivoChat widget icon will not be displayed. Instead, you will see a custom button from Wix in a fixed section on your website. In case you would like to use JivoChat's default widget, please install the chat by following the instructions on method #1 in this tutorial.
Method 3. Insert JivoChat HTML code on an HTML box#
Known limitations of this installation method:
- Facebook omnichannel option will not be displayed in the chat window.
- Wix does not support our chat mobile version, so it will not be shown on mobile devices.
- Integration with Google Analytics will not work.
If those issues are not a problem for you and you still prefer to install with this method:
1. Access the Wix panel and go to Edit site section. Click on Add button and go to Embed > Custom Embed > Embed a widget.
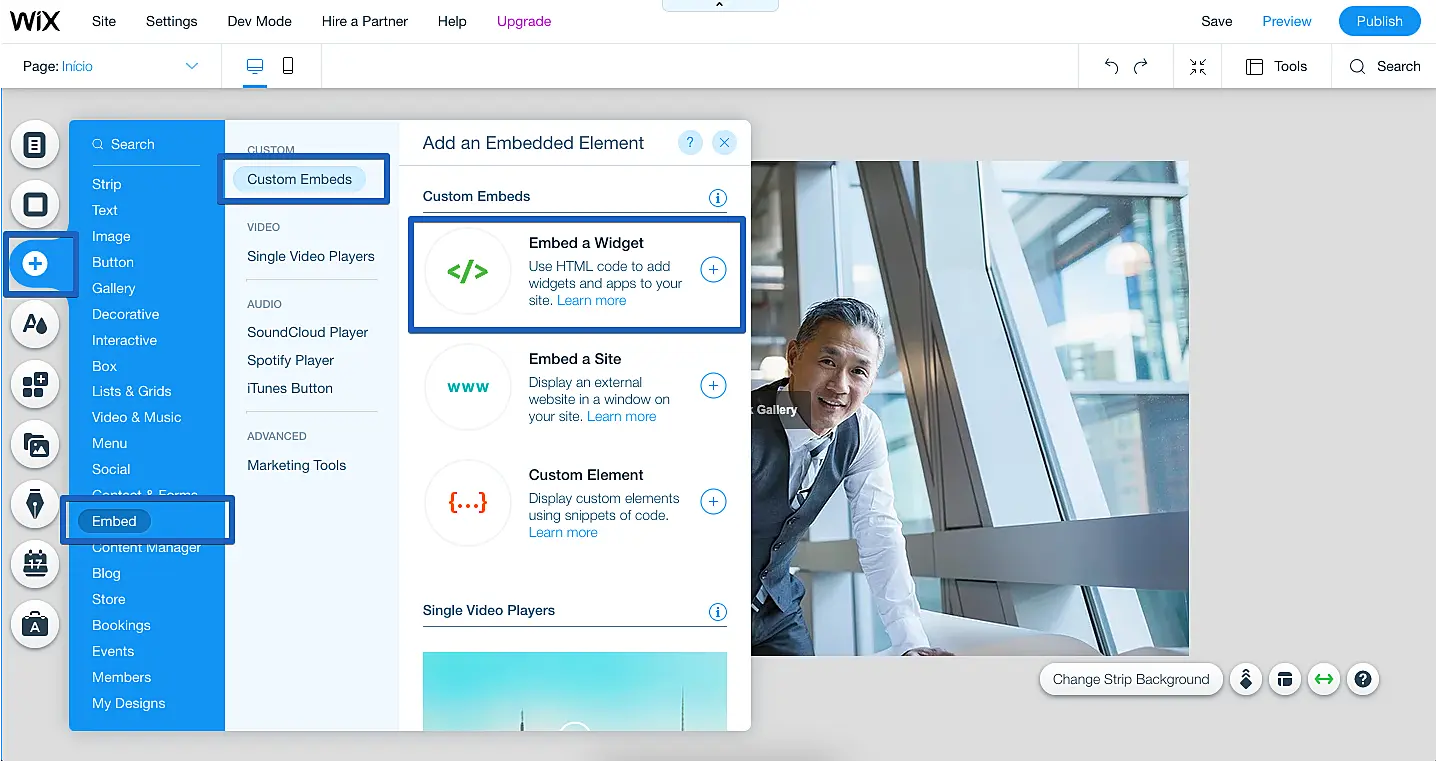
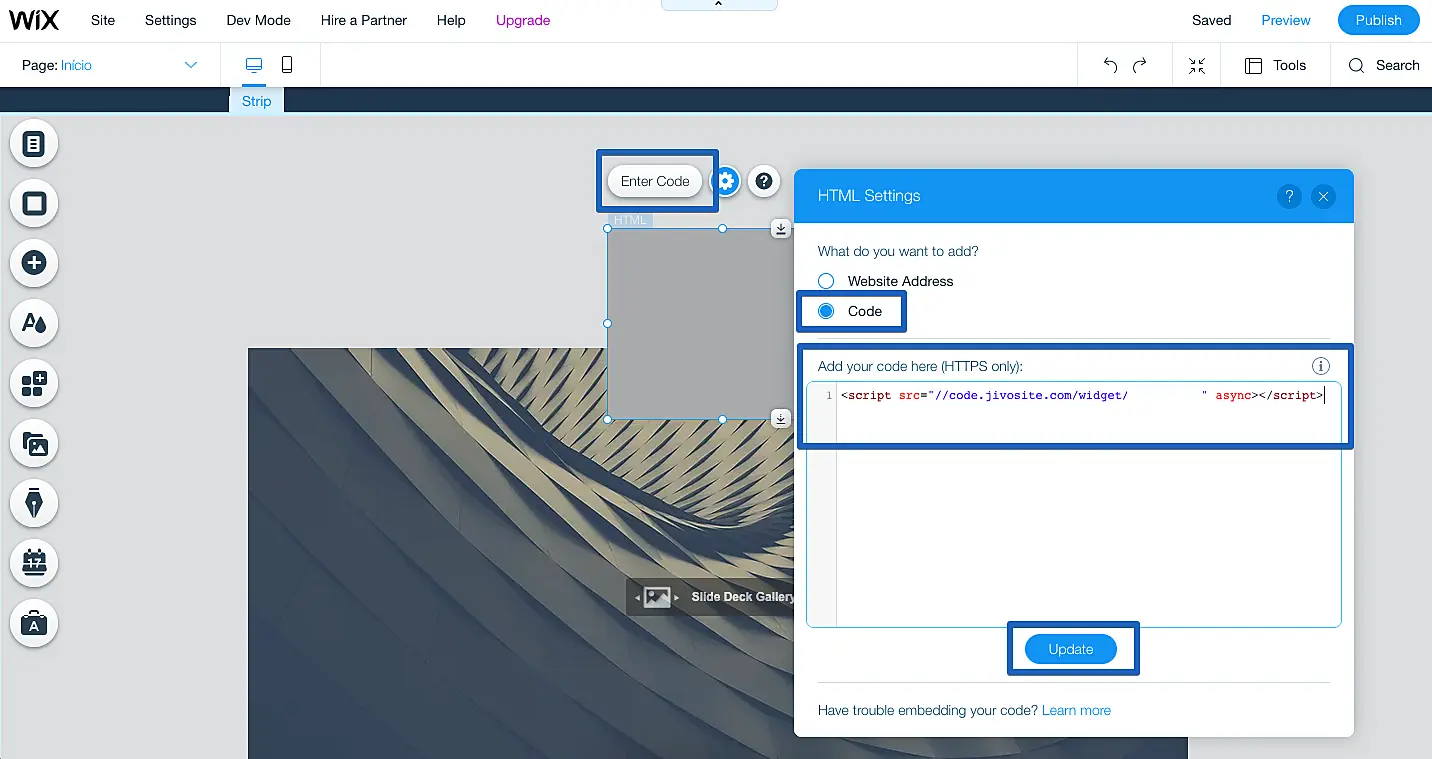
2. Click on Enter code, select the option Code and paste JivoChat installation script in the field Add your code here (HTTPS only). After that, click on Update.
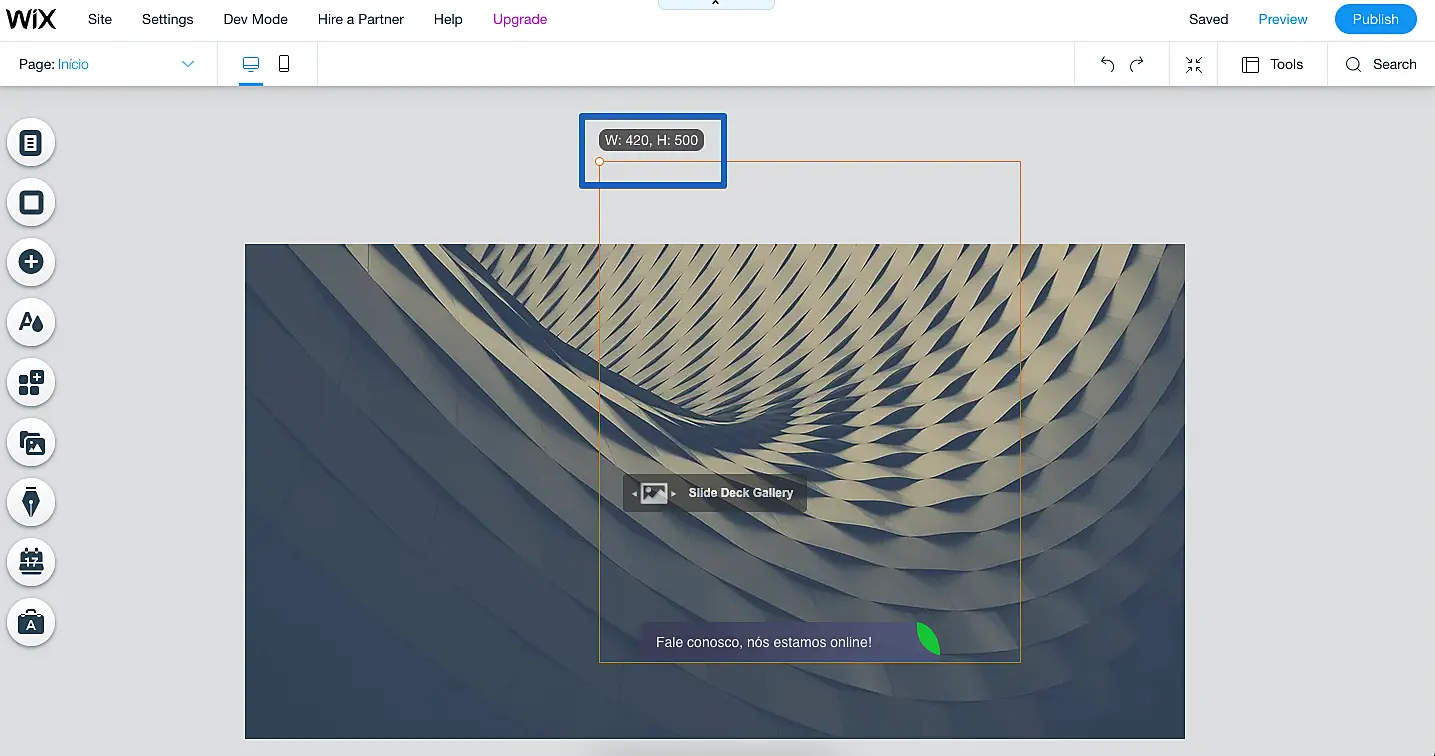
3. Next, you need change the size of the widget. Drag the borders of the widget, you should set the size to 420x500.
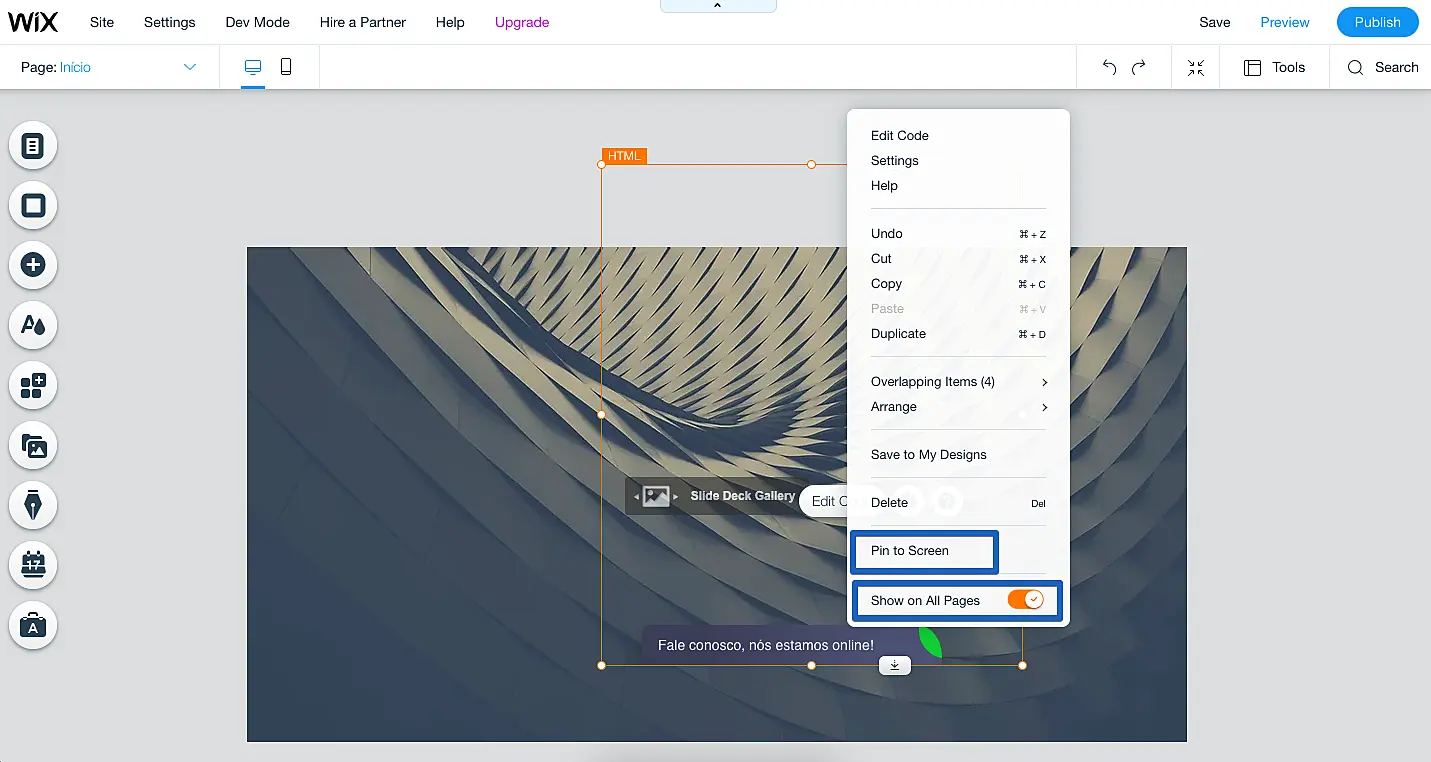
4. Right-click on the widget to open options menu. Enable the option Show on all pages and then click on Pin to Screen.
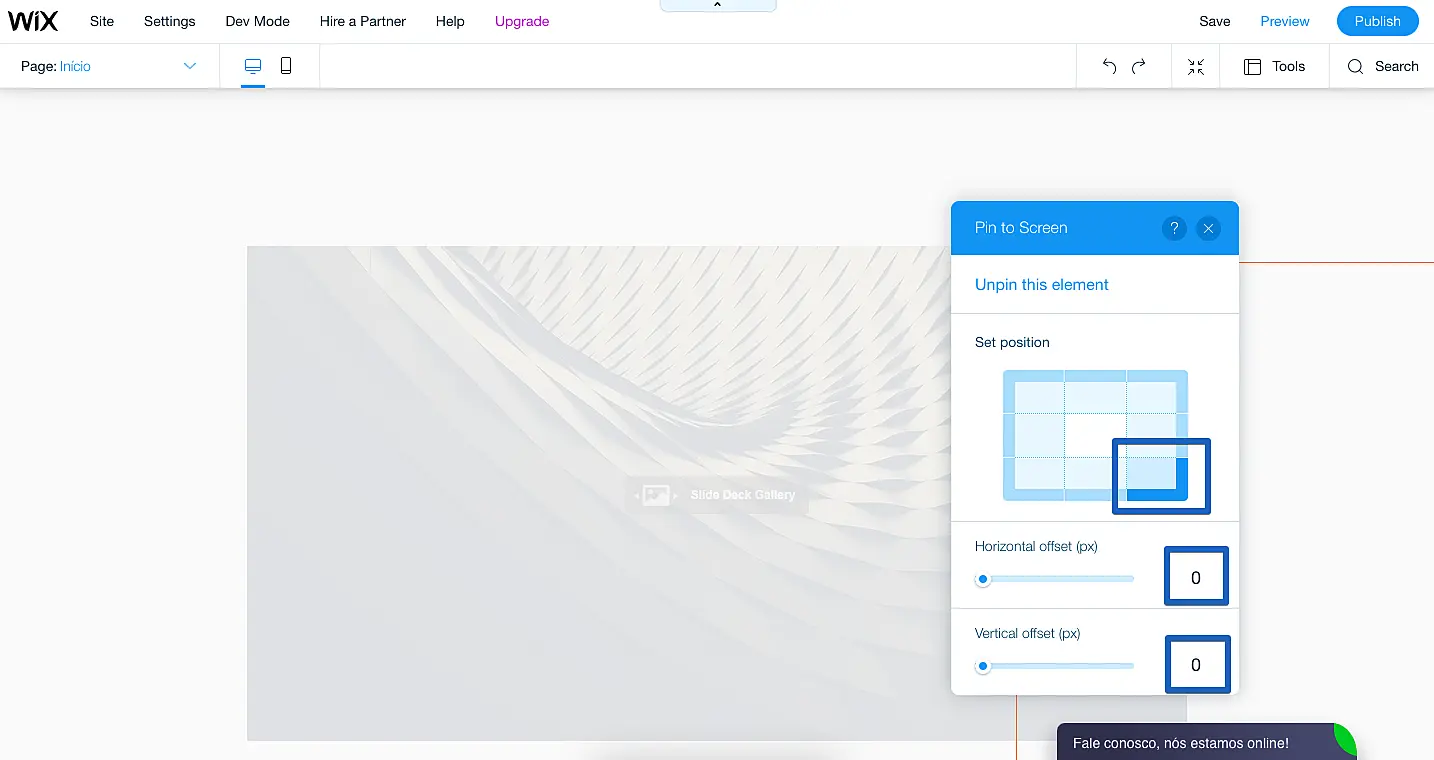
5. Choose the chat position and set both Horizontal offset and Vertical offset to 0.
6. Click on Publish button at the top right corner and that's all!

